3D Printing with the Creality Ender 3
Group project • Beginner's guide to 3D printing • Queen's University Belfast
Project Goal & Objective
The objective was to create a comprehensive, beginner-friendly guide that takes an operator with zero prior 3D printing experience from an unassembled box of flat-packed mechanical components through to a dimensionally verified, high-quality first print.
Key Engineering Responsibilities
- Complete Mechanical Assembly: Erected vertical aluminum extrusion frame, squared structural uprights, aligned the Z-axis lead screw coupler, tensioned X and Y timing belts, and conducted strict pre-power electrical safety inspections.
- Precision 4-Point Bed Levelling & Z-Offset: Calibrated heated bed trammel using the thermal 0.1 mm paper drag method at 60°C, fine-tuning nozzle standoff distance to achieve ideal first-layer squish without bed scarring or unadhered lines.
- Slicer Configuration in UltiMaker Cura: Defined custom print profiles balancing speed (50 mm/s), outer wall quality (30 mm/s), layer resolution (0.2 mm), and structural gyroid/grid infill density (15–20%).
- Empirical Calibration Suite: Systematically printed and evaluated a multi-tier Temperature Tower (190°C–230°C), a dual-pillar Retraction Stringing test, and a 20×20×20 mm calibration cube measured with digital vernier calipers.
- End-to-End Proof of Setup: Printed complex organic test models including a sleeping Mew figure and Squirtle miniature, proving overhang stability, support interface removal, and surface finish.
- Team Leadership & Delivery: Proactively followed up with underperforming team members, redistributed hands-on build tasks, and synthesized the final 21-slide presentation guide, securing a top score.
Mechanical Assembly & Electrical Safety
A rigid, perfectly squared mechanical chassis is the foundation of additive manufacturing accuracy. Misalignment in the gantry uprights or uneven belt tension induces binding, layer shifts, and dimensional drift that slicer adjustments cannot correct.
Slid vertical aluminum 2040 extrusions into the base carriage. Fastened M5 bolts loosely, measured corner diagonals with calipers to enforce perpendicular 90° squareness, and torqued fasteners incrementally.
Mounted Z stepper motor to the left vertical frame. Fitted the lead screw into the flexible coupling with precise axial alignment. Secured grub screws to prevent backlash while maintaining smooth vertical gantry transit.
Calibrated tension on X (gantry) and Y (heated bed) reinforced fiberglass belts. Adjusted idler pulleys until belts twanged like a taut guitar string, eliminating mechanical backlash without overloading stepper bearings.
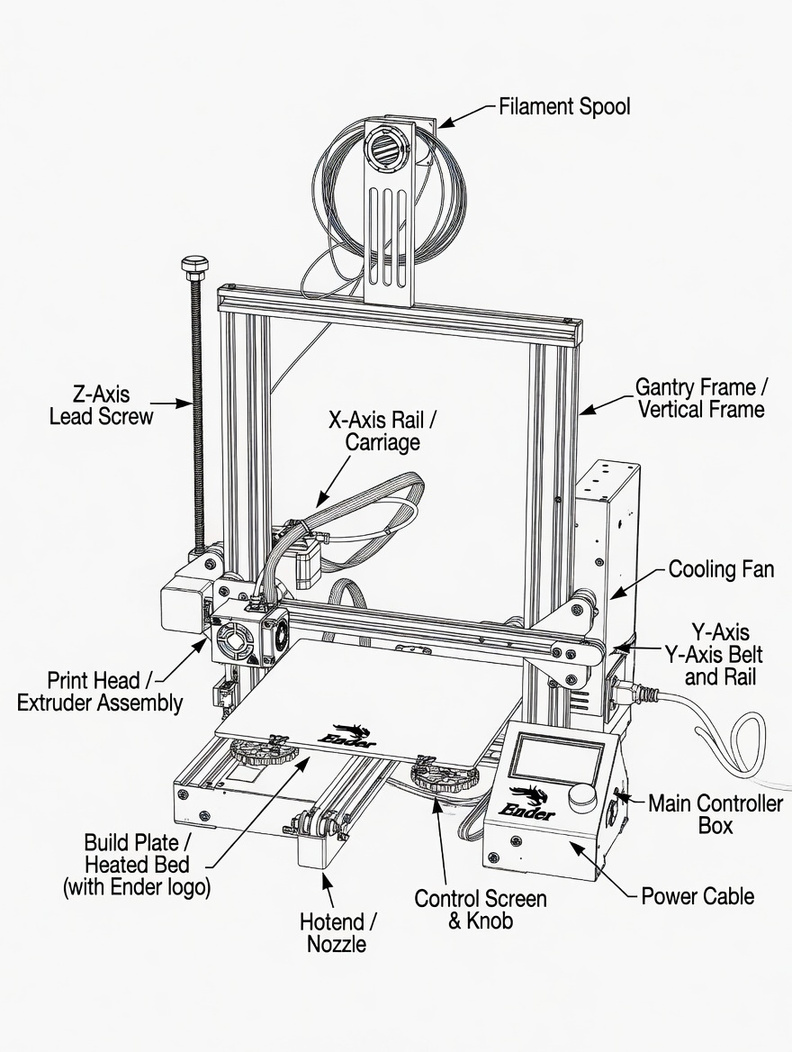
Labeled schematic showing filament spool feed line, Z-axis lead screw, X-axis carriage, main controller enclosure, and heated build plate.
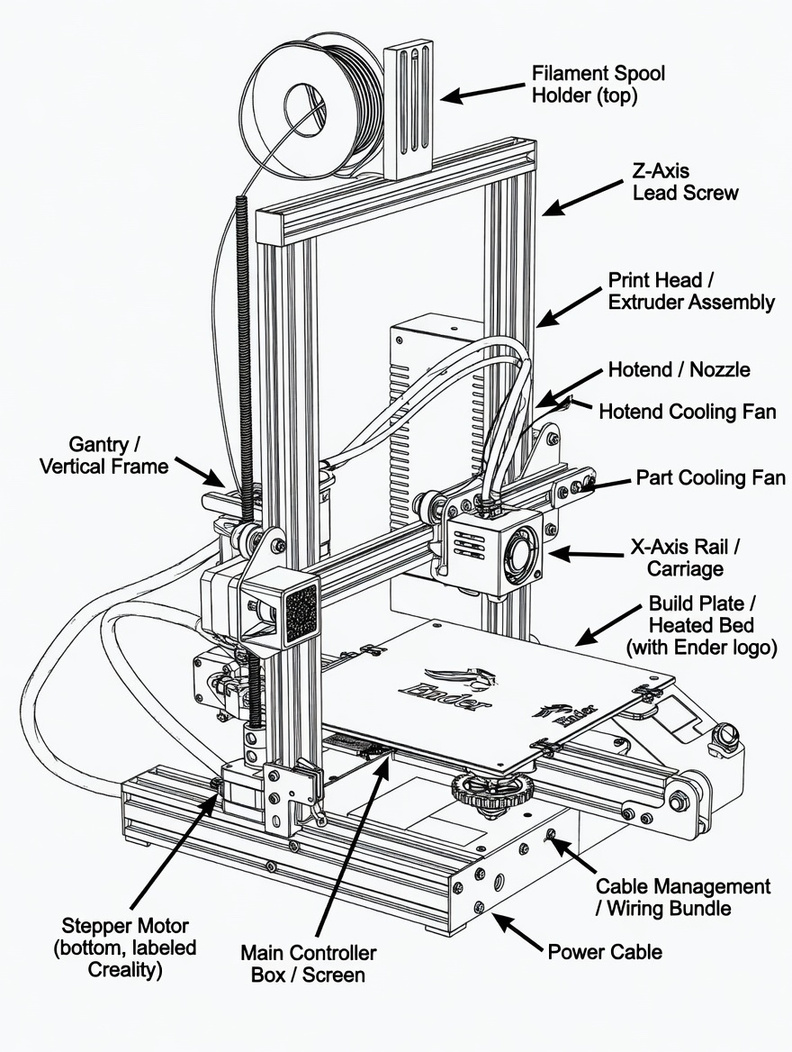
Isometric view illustrating hotend cooling fan assembly, part cooling duct, Bowden tube guide path, cable management clips, and bottom stepper motors.
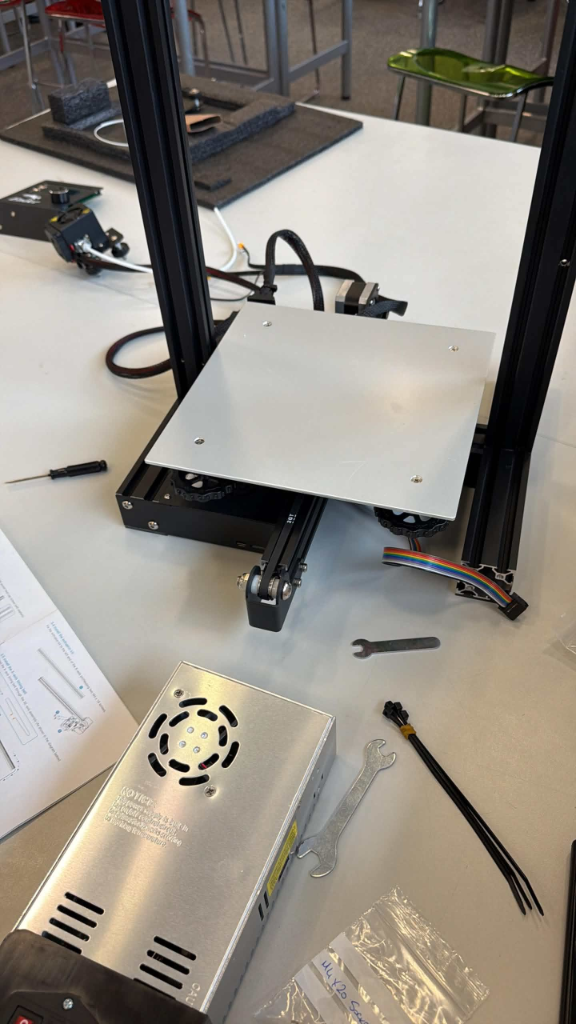
Partially assembled Ender 3 chassis on the workbench — vertical aluminium extrusions mounted, heated bed carriage seated on linear rails, and PSU unit staged for wiring.
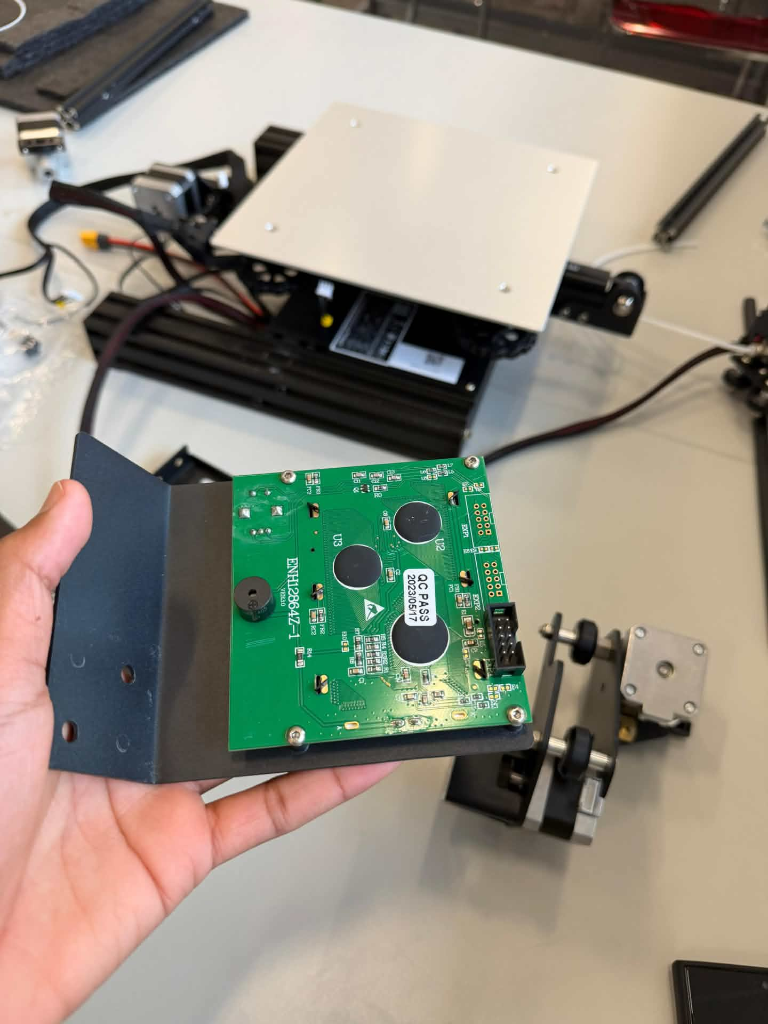
Main controller board with QC Pass sticker, stepper driver ICs, buzzer, and ribbon cable connectors — inspected before mounting into the enclosure beneath the heated bed.
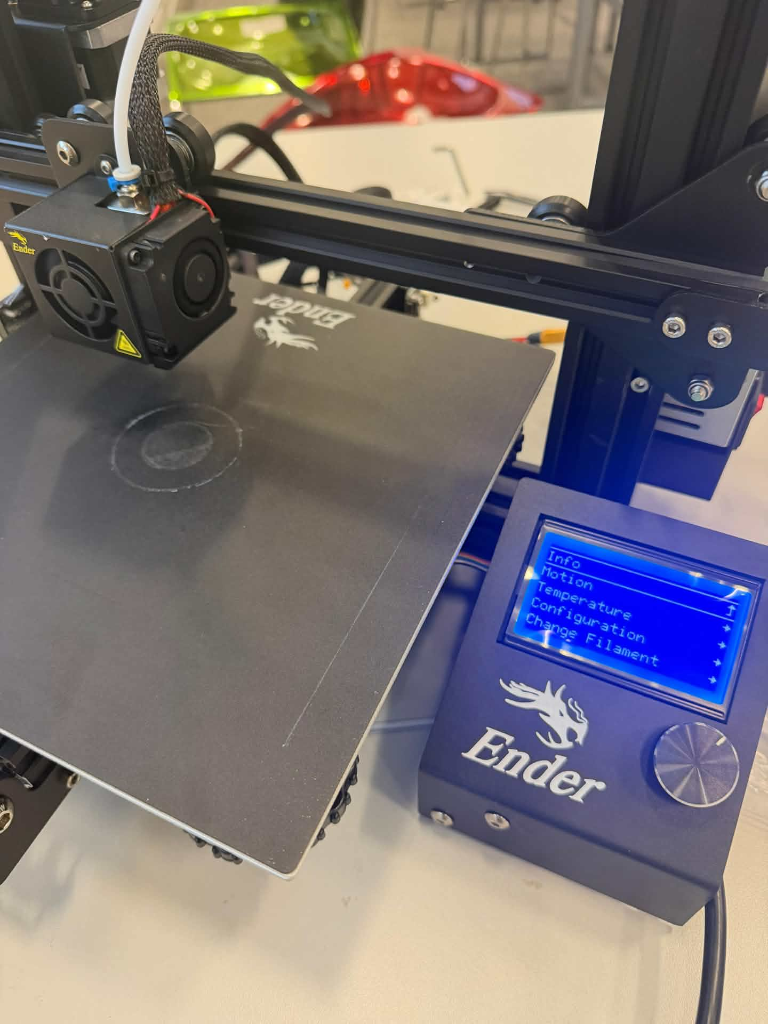
Fully assembled Ender 3 with LCD control panel powered on, hotend assembly visible, and glass build plate mounted — ready for first calibration print.
Electrical Verification & Power-On Checklist
Critical Safety Gate- Mains Voltage Selector: Verified the red mechanical rocker switch on the rear power supply unit was set to 230V (UK/Europe standard). Switching while set to 115V causes instant catastrophic PSU failure.
- End-Stop Limit Switches: Verified keyed wiring harness connections to X, Y, and Z mechanical microswitches to ensure accurate home datum positioning during auto-homing.
- Cable Strain Relief & Clearance: Bound the heated bed wiring bundle and ribbon cables with chassis clips to prevent snags during full 235 mm bed excursions.
First-Time Configuration: Bed Levelling & Z-Offset
First layer adhesion is where 90% of print failures originate. The Creality Ender 3 requires manual 4-corner tramming and precise Z-offset configuration to guarantee uniform 0.20 mm bead geometry across the entire build envelope.
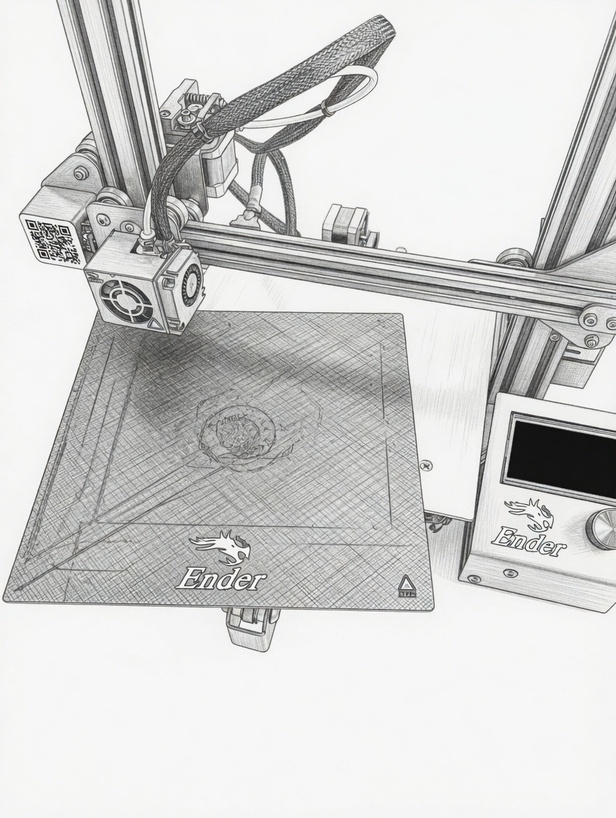
Top plan technical drawing depicting heated bed surface, retention binder clips, perimeter skirt trace, and thumb wheel adjustment points.
The Thermal Paper Method
- Step 1 – Thermal Expansion: Preheated heated bed to 60°C and hotend to 200°C via Prepare > Preheat PLA before levelling. Leveling cold leads to nozzle scrape as metals expand when hot.
- Step 2 – Auto Home & Release: Initiated Auto Home to reset X/Y/Z end-stops, followed by Disable Steppers to permit smooth manual printhead translation.
- Step 3 – 4-Corner Paper Drag: Positioned a standard 80 gsm sheet of A4 paper (~0.1 mm thickness) beneath the nozzle above each corner leveling screw. Adjusted thumbwheels until a subtle, consistent drag was felt.
- Step 4 – Iterative Passes: Repeated corner adjustments 3 times continuously, because turning one thumbwheel shifts the opposite pivot corner.
- Step 5 – Z-Offset Fine Tuning: Set Z-offset to prevent nozzle scraping while ensuring adequate mechanical extrusion squish onto the build surface.
Empirical Calibration Suite & Slicer Tuning
Before releasing the printer for production prints, I systematically executed three critical calibration tests in UltiMaker Cura to determine optimal filament extrusion temperature, retraction speed, and dimensional accuracy across all three axes.
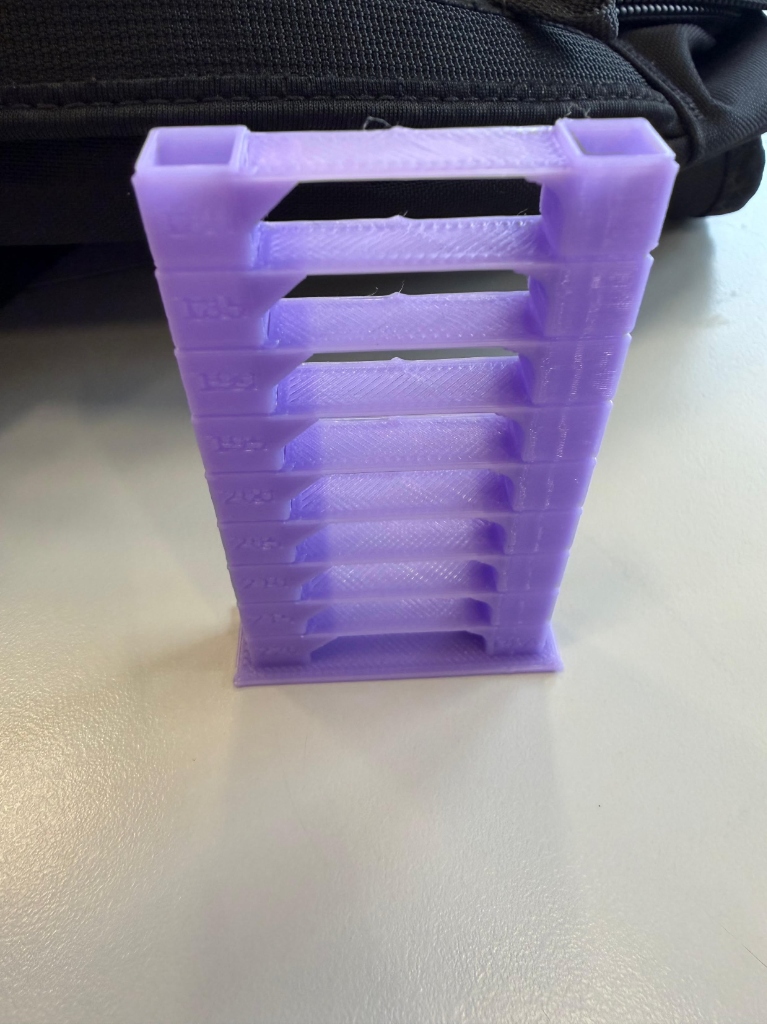
Segmented vertical tower printing horizontal bridges and overhangs at varying temperatures. Tested layer bonding and surface finish, identifying 200°C as the ideal sweet spot for PLA with zero sagging.
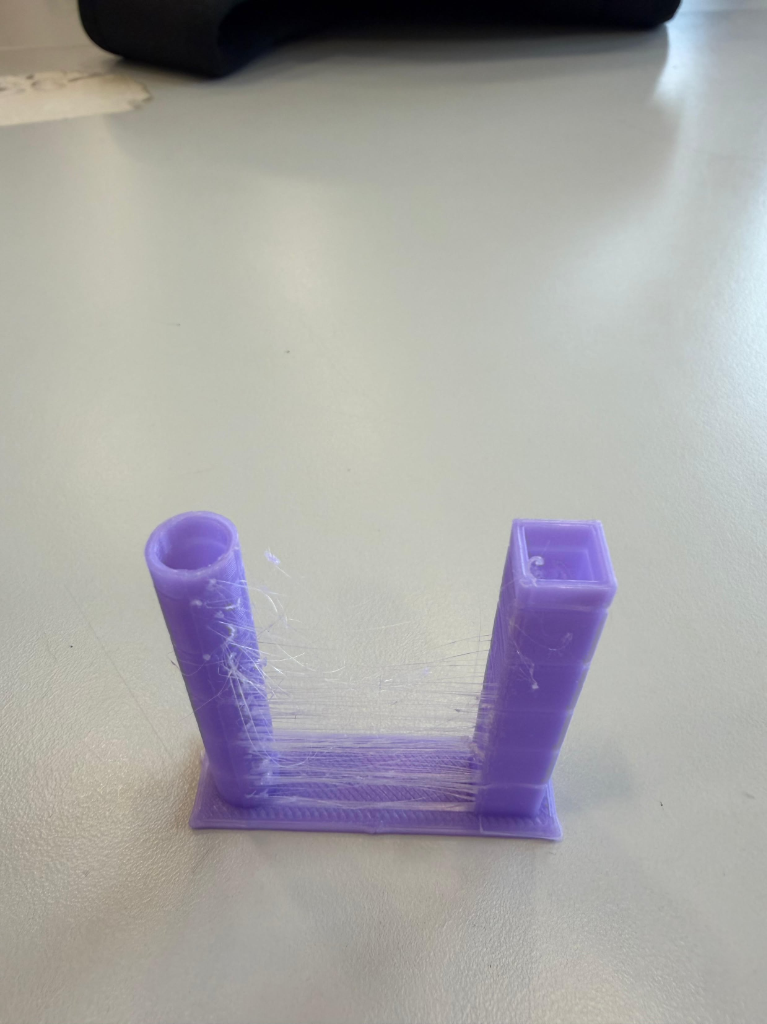
Dual-pillar test analyzing microscopic stringing across open gaps. Diagnosed nozzle pressure drop and tuned Bowden retraction distance to 5.5 mm at 45 mm/s, completely eliminating wisps and ooze.
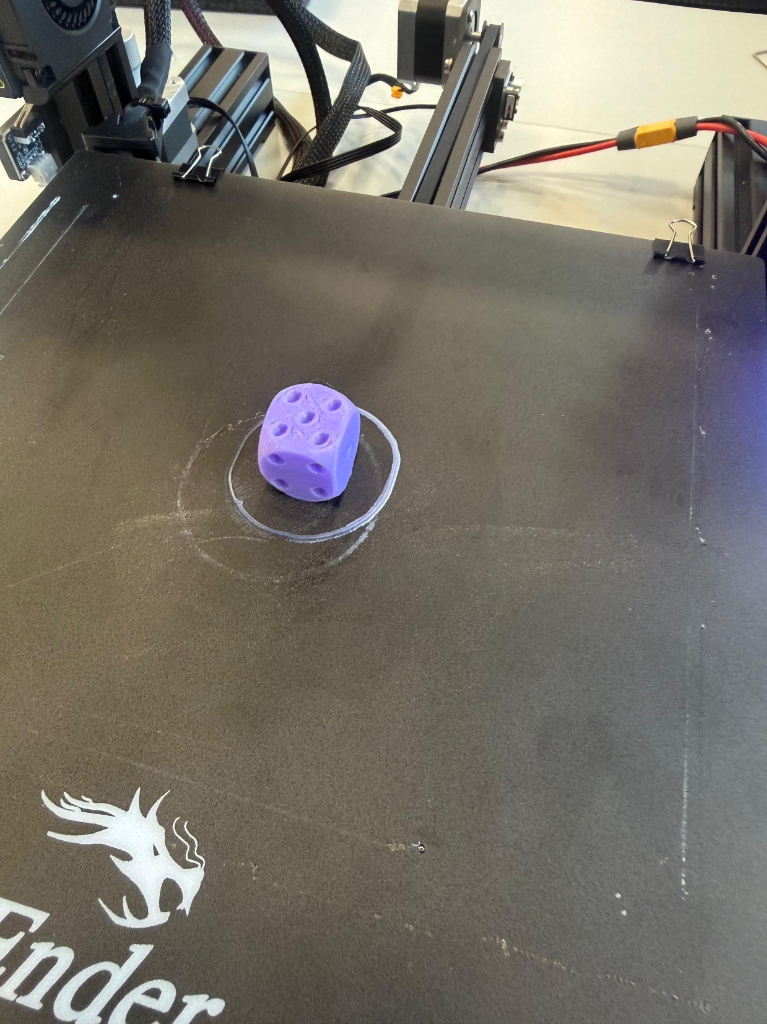
Precision calibration print directly on the Creality Ender 3 bed. Measured with vernier calipers to confirm X, Y, and Z dimensional accuracy within ±0.05 mm tolerance of theoretical target.
UltiMaker Cura Calibrated Slicer Profile
| Parameter | Calibrated Value | Technical Rationale |
|---|---|---|
| Layer Height | 0.20 mm Standard Quality | Optimal equilibrium between vertical feature resolution, print time, and layer-to-layer bond strength. |
| Hotend Temperature | 200 °C (Initial Layer 205 °C) | Determined via temperature tower to guarantee complete filament melt without thermal polymer degradation or stringing. |
| Heated Bed Temperature | 60 °C Constant | Maintains PLA polymer above its glass transition temperature (~55°C–60°C) to eliminate thermal contraction corner curl. |
| Print & Wall Speed | 50 mm/s (Outer Wall: 30 mm/s) | Slow outer shell velocity minimizes centrifugal corner ringing and ghosting caused by gantry momentum. |
| Retraction Settings | 5.5 mm Distance / 45 mm/s Speed | Mitigates Bowden tube pneumatic hysteresis, preventing molten filament drool across rapid travel moves. |
| Infill Pattern & Density | 20% Grid / Gyroid | Balances internal structural compressive resistance with rapid cycle times and low material consumption. |
| Build Plate Adhesion | Skirt (3 Lines, 4 mm Offset) | Primes extruder nozzle and permits visual verification of bed tramming before laying the primary model footprint. |
Personal Interest Prints: Mew & Squirtle
Beyond diagnostic towers and cubes, I fabricated personal interest prints to test the Creality Ender 3 through full real-world fabrication. These custom character prints served as an end-to-end stress test for compound organic double-curvatures, delicate overhang bridging, tree support detachment, and outer wall surface aesthetic finish.
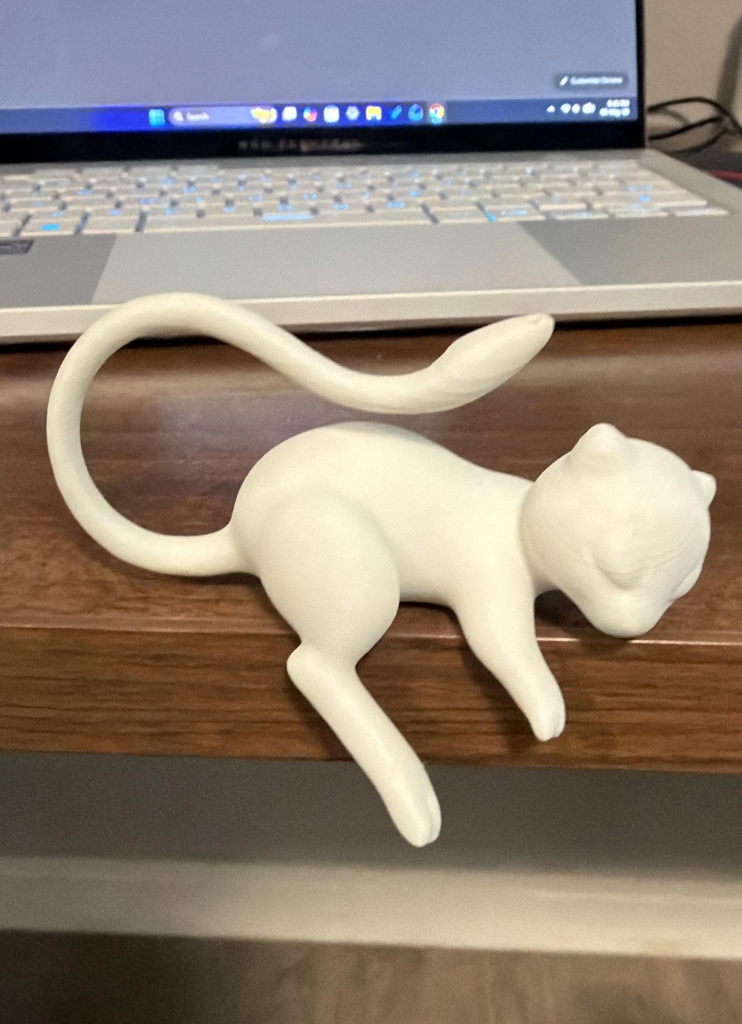
Custom personal interest print in pure white PLA, designed to balance gracefully over a desk or laptop bezel. Evaluated high-aspect-ratio curved tail tensile cohesion, smooth organic body lofting, and clean overhang support breakaway without scarred contact marks.
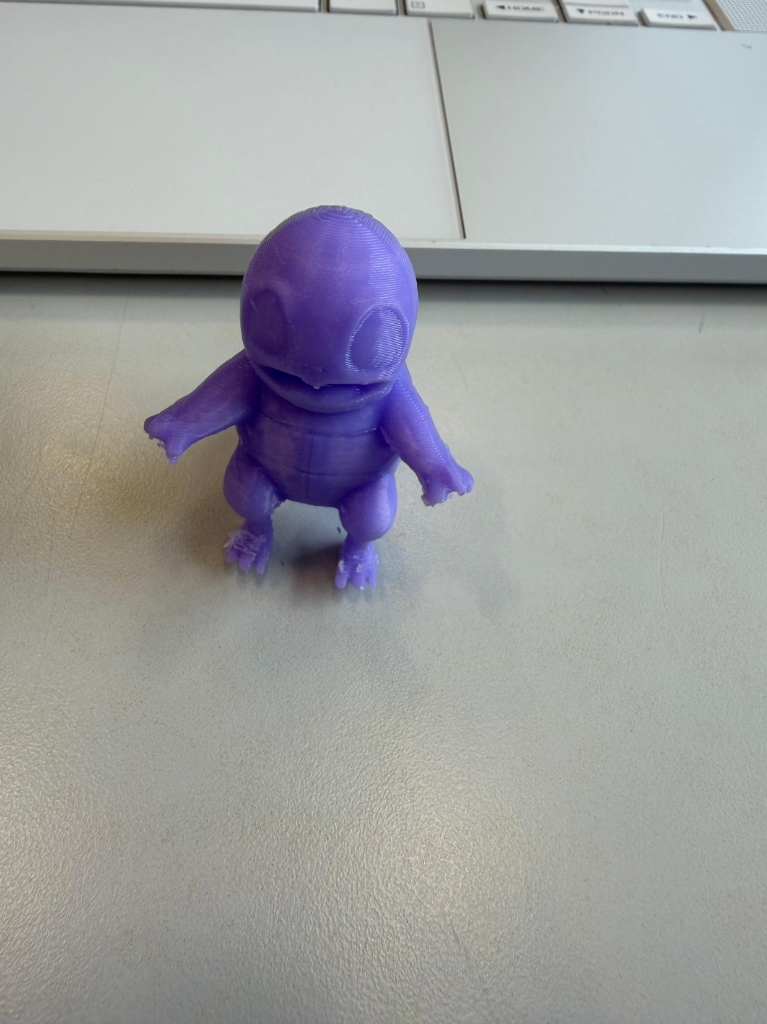
Fabricated in lavender purple PLA filament. Verified hemispherical dome top layer closure without thermal pillowing, sturdy shell cohesion across limbs and tail, and crisp 0.20 mm facial contour definition with zero stringing.
Leadership, Team Coordination & Troubleshooting Guide
Engineering excellence requires both technical execution and collaborative accountability. As team leader, I resolved team engagement roadblocks while authoring an actionable diagnostic framework for common 3D printing anomalies.
During the initial phase of the project, participation among team members was inconsistent, threatening deliverable milestones and calibration quality. Recognizing the risk, I stepped forward as Team Leader:
- Direct Communication & Follow-Up: Contacted disengaged teammates individually to identify hurdles, clarify expectations, and rebuild momentum without creating friction.
- Role Specialization & Work Breakdown: Restructured the workflow into distinct, actionable packages (mechanical chassis assembly, Cura slicer optimization, slide synthesis, calibration documentation).
- Collaborative Hands-On Sessions: Led interactive in-person tuning sessions at the printer workbench, ensuring all team members gained direct experience in manual bed leveling and printer control.
8-Point FDM Printing Diagnostic & Troubleshooting Guide
Synthesized into our presentation guide to help novice operators rapidly isolate and resolve real-world print defects:
| Defect / Symptom | Probable Root Causes | Systematic Corrective Action |
|---|---|---|
| Print Not Sticking to Bed | Bed unlevelled, nozzle Z-offset too high, bed too cold, oils on build plate. | Action: Re-level bed using paper drag at 60°C. Decrease Z-offset. Clean build plate with Isopropyl Alcohol (IPA). |
| Stringing & Oozing | Nozzle temperature excessive, insufficient retraction distance or travel speed. | Action: Drop nozzle temperature by 5°C. Increase retraction to 5.0–6.0 mm at 45 mm/s. Run temp tower. |
| Clogged / Jammed Nozzle | Particulate in filament, heat creep in cold end, improper feed temp. | Action: Heat hotend to 220°C and perform a cold pull. Clean nozzle with acupuncture needle or replace 0.4mm brass nozzle. |
| Layer Shifting | Loose X or Y timing belt, excessive acceleration, toolhead collision. | Action: Tension timing belts until resonant. Reduce print speed from 60 mm/s to 45 mm/s. Check stepper driver Vrefs. |
| Warping / Lifting Corners | Ambient drafts, bed temperature insufficient, lack of brim adhesion. | Action: Raise bed temperature to 60–65°C. Add a 5 mm brim in Cura. Shield printer from room drafts. |
| Under-Extrusion | Extruder arm tension arm slipping, partially blocked nozzle, low print temp. | Action: Inspect extruder idler spring tension. Check Bowden tube seating against heatbreak. Increase temp 5°C. |
| Elephant's Foot | Nozzle spaced too close to bed, bed temperature excessive causing base sag. | Action: Slightly raise Z-offset. Lower bed temperature to 55°C after first layer. Enable Cura initial layer horizontal expansion. |
| Rough Outer Surfaces | Layer height excessive, loose V-slot roller eccentric nuts, over-extrusion. | Action: Reduce layer height to 0.15–0.2 mm. Tighten eccentric spacers on gantry wheels to eliminate play. |
Download 3D Printing Guide Presentation
Access the original PowerPoint slide deck created for Queen's University Belfast, covering unboxing, mechanical frame squaring, 230V electrical checks, bed tramming, UltiMaker Cura slicing, calibration towers, and troubleshooting matrices.